Up
ABG flywheel magneto
Bosch flywheel magneto
CAV 3U1 magneto
Joe Hunt magneto
Lucas SR1
Magnéto Novi
Morel G1 magneto
Villiers flywheel magneto
Wico-Pacy Series 90 magneto
Wico-Pacy Series A magneto
Wipac Series 191 flywheel magneto |
|
Universal EasyCap for Joe Hunt Rotating-Magnet Magneto
 The various models of Joe Hunt rotating-magnet magnetos have a
contact-breaker assembly similar to what you'd find in a typical 1950s
car. The various models of Joe Hunt rotating-magnet magnetos have a
contact-breaker assembly similar to what you'd find in a typical 1950s
car.
The moving contact-breaker point A is live, and the end of
its spring B is connected to the live wire C from the LT
winding, the live wire D from the condenser E and a
cut-out wire F, with the whole affair being fixed to an earthed
lug G by an insulating block H and screw J.
The photos
show the arrangement in the model of Joe Hunt magneto that can be
used in place of the Lucas K2F or BTH KC2.

There are two methods of fitting an EasyCap: one in place of the
insulating block H; and the other in place of the old condenser
E.
|
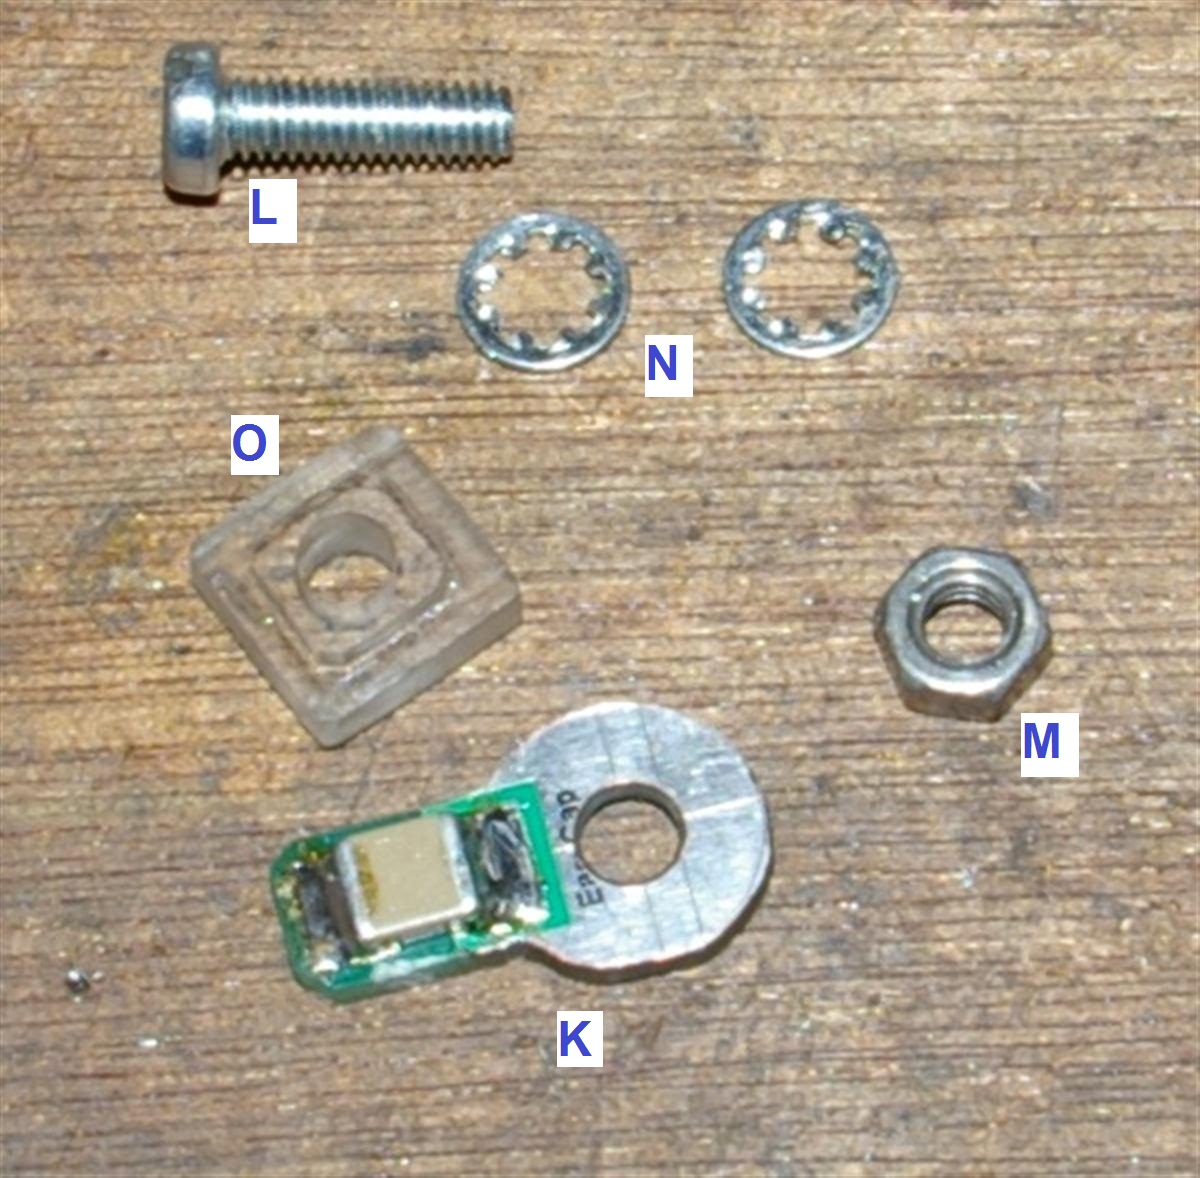
Fitting the Universal EasyCap in Place of the Insulating Block
 You
will need to shape and drill the Universal EasyCap K as shown in
the photo. You will also need a machine screw L (e.g. M4 x 15
mm), a nut M and a couple of washers N, and you will need
to make a new insulating block O. The insulating block can easily
be made from a piece of plastic, such as acrylic sheet, using a drill,
junior hacksaw, file and vice. You
will need to shape and drill the Universal EasyCap K as shown in
the photo. You will also need a machine screw L (e.g. M4 x 15
mm), a nut M and a couple of washers N, and you will need
to make a new insulating block O. The insulating block can easily
be made from a piece of plastic, such as acrylic sheet, using a drill,
junior hacksaw, file and vice.
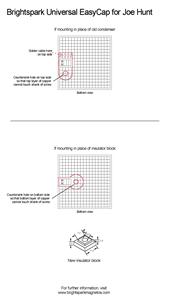
For a template for the EasyCap and a dimensioned drawing of the
insulating block, please
click
here.
|
| |
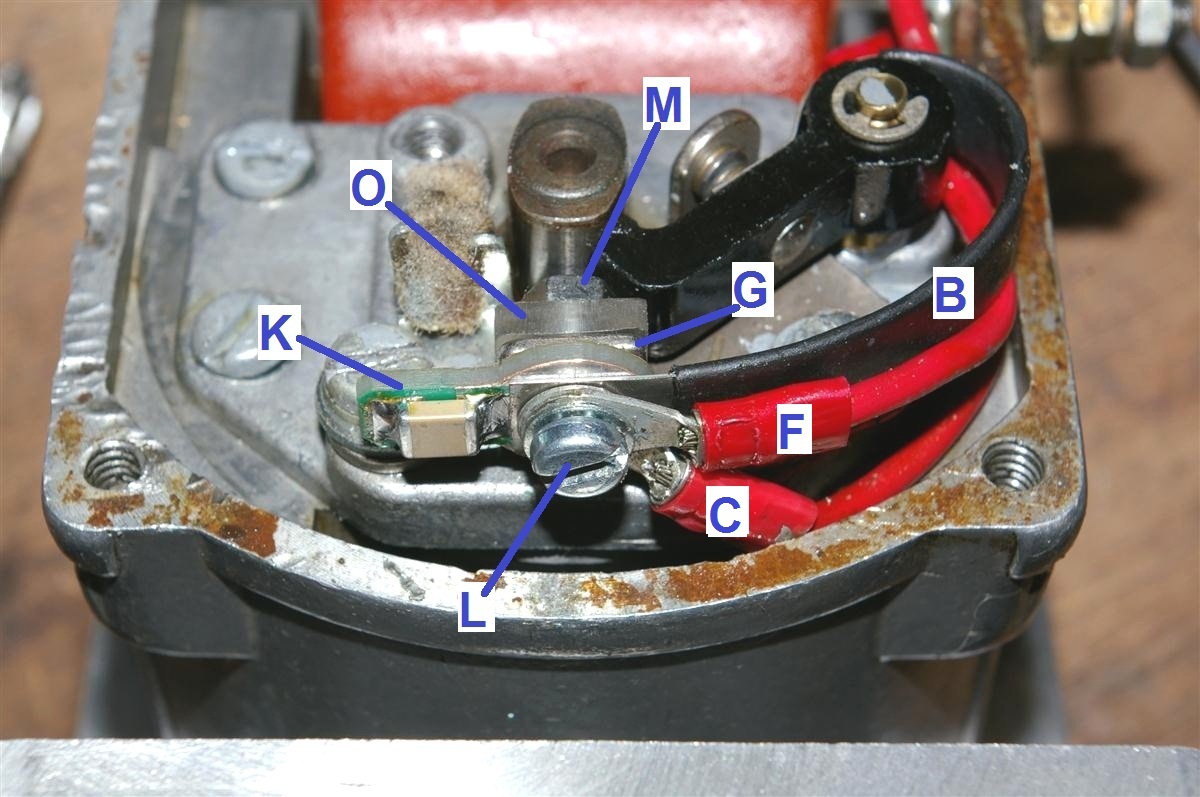 Remove the screw J, old insulating block H and old
condenser E. Pass the new screw L in order through:
- one of the washers N;
- the terminal tag of the cut-out wire F;
- the terminal tag of the live wire C from the LT winding;
- the hole in the end of the contact breaker spring B;
- the hole in the EasyCap K, with the capacitor side of the
EasyCap facing outwardly;
- the square hole in the lug G;
- the new insulating block O so that the smaller portion of
the block fits into the square hole in the lug G;
- the other washer N; and
- finally the nut M.
Tighten
the screw L, and the job is done.
|
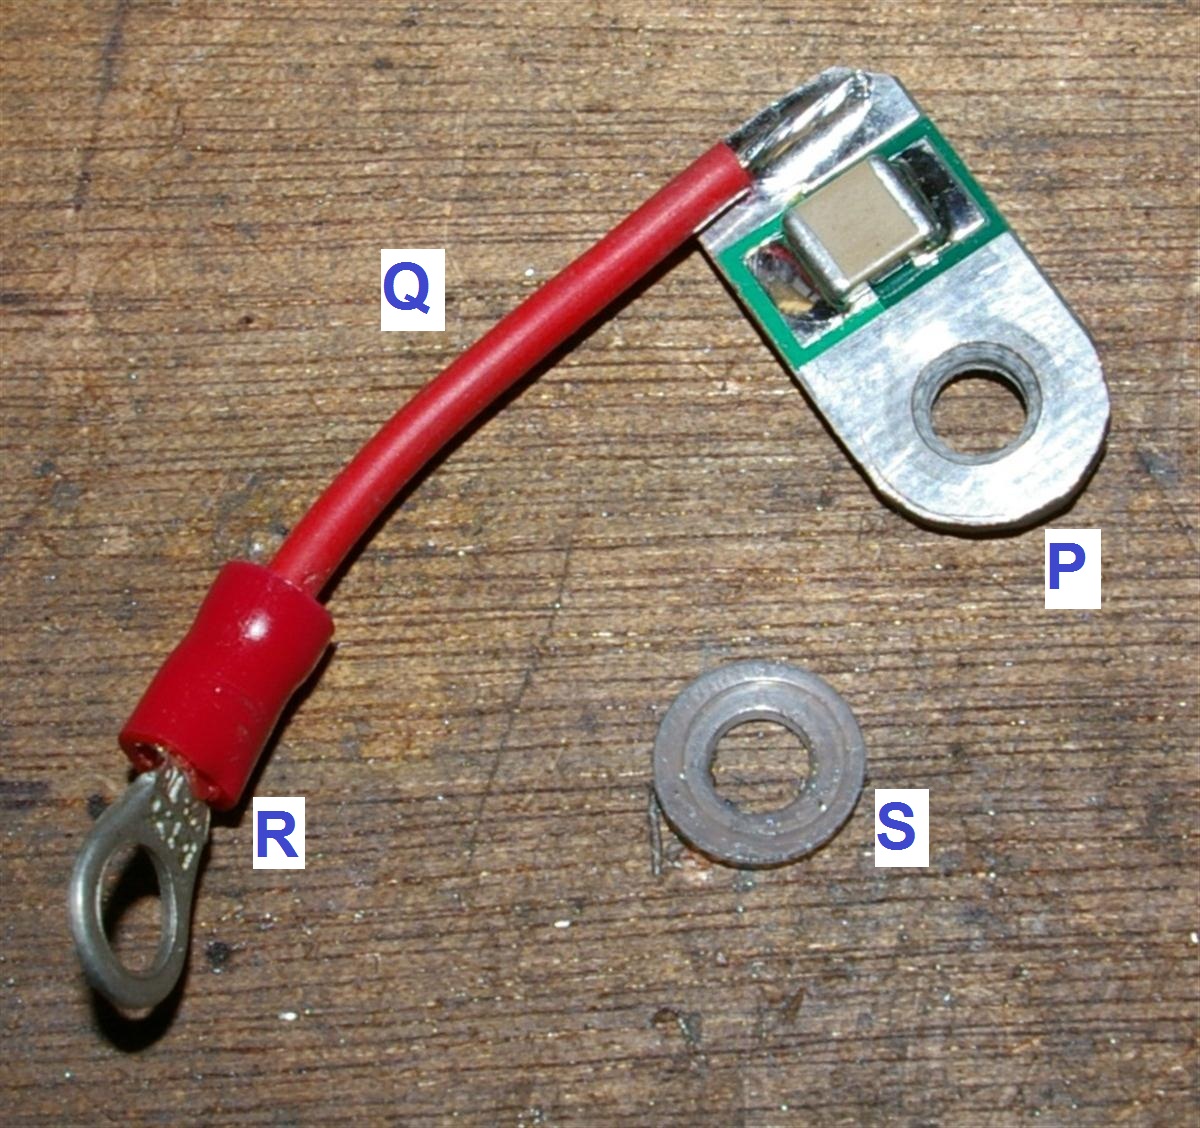
Fitting the Universal EasyCap in Place of the Old Condenser
You
will need to shape and drill the Universal EasyCap P as shown in
the photo. You will also need to solder a short piece of wire Q
with a terminal tag R onto the EasyCap. Be careful not to
overheat the EasyCap's capacitor. You will also need an insulating
washer S.
For a template for the EasyCap, please
click
here.
|
| |
|
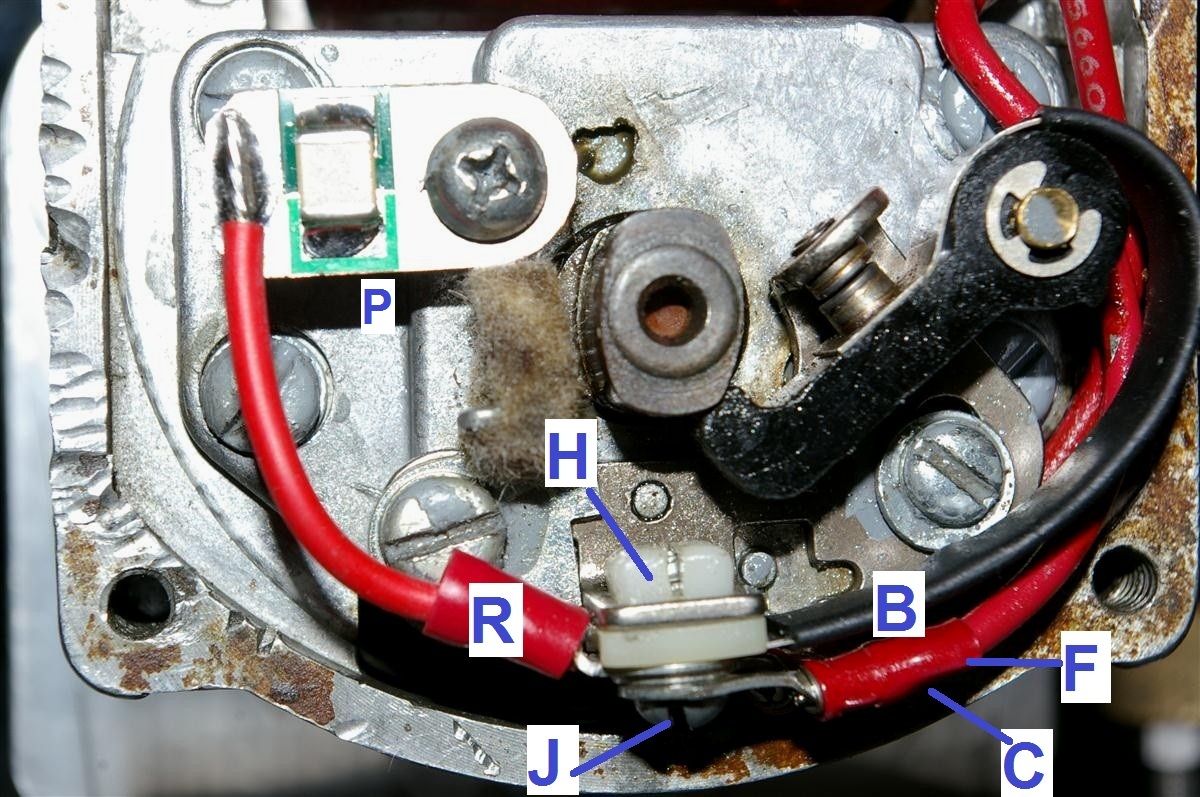 Remove the screw J. Remove the screw J.
Remove the old condenser E and mount the EasyCap P in its
place using the same mounting screw with the insulating washer S
under its head..
Replace the screw J so that is passes through:
-
the
terminal tag of the cut-out wire F;
- the terminal tag of the live wire C from the LT winding;
- the terminal tag R of the EasyCap P;
- the hole in the end of the contact breaker spring B; and
- into the insulating block H.
Easy!
|
|
|
 Brightspark Magnetos